Reading Basic Circuit Symbols
Schematic diagrams look like secret codes — but once you know the symbols, you can read any circuit! Join Nitvi as she learns the essential circuit symbols.
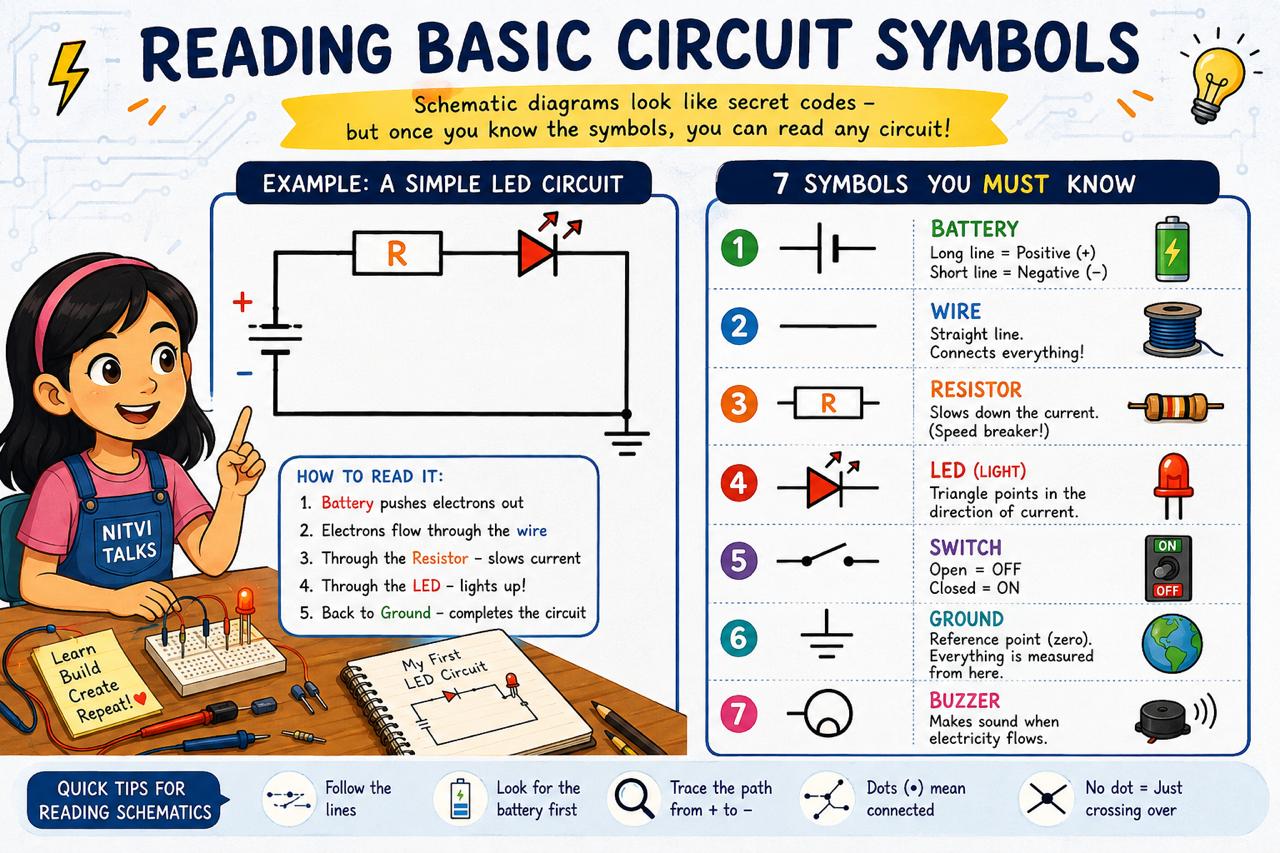
Have you ever looked at an electronics book and seen something like this? 👇
   ┌───[ R ]───┬──[ LED ]──┐
   │           │            │
  [+]          │            │
  [B]          ⏚           │
  [-]                       │
   │                        │
   └────────────────────────┘
That’s called a schematic diagram — a special drawing that shows how electronic components connect. It’s like a map for circuits! 🗺️
Instead of drawing realistic pictures of batteries, wires, and LEDs every time, engineers use simple symbols. Once you learn them, you can read any circuit in seconds!
Why Symbols? 🤔
Imagine if every map showed real buildings, trees, and roads — it would be impossible to read! Maps use symbols (a blue line = river, a red dot = city) to keep things clear.
Schematics work the same way. Instead of drawing a realistic battery with labels, we use a simple symbol. Simple = fast = less confusing!
The 7 Symbols You MUST Know ⚡
1. Battery 🔋
─┤├─Long line = positive terminal (+) Short line = negative terminal (−)
Think of it like a stretched spring — the longer line has more “push” (voltage)!
2. Wire ───
──────Just a straight line. Wires connect everything together. They’re the “roads” on our circuit map!
3. Resistor 🟫
──[ W ]──Looks like a little box (or a zigzag in older diagrams). This is the speed breaker — it slows down the current!
I learned about resistors the hard way — my LED almost burned out! Read about it in My First LED Project. 💡
4. LED (Light) 💡
──(>|)──A triangle pointing at a line — with two little arrows pointing out. The triangle shows the direction the current must flow. The arrows mean “light comes out!”
Important: The triangle always points in the direction current flows (anode → cathode). Connect it backwards and nothing happens!
5. Switch 🔘
──/ ──A little lever that can be open (broken connection) or closed (connected). Open switch = circuit is OFF. Closed switch = circuit is ON!
Think of it like a drawbridge — when it’s up, no cars can cross. When it’s down, traffic flows! 🌉
6. Ground ⏚
──⏚Three lines getting smaller. Ground is the reference point — like saying “this is zero.” Everything in the circuit is measured compared to ground.
Think of it like sea level — we measure all mountains from sea level, and we measure all voltages from ground! 🏔️
7. Buzzer 🔊
──( ☼ )──A circle with a little half-circle inside. When electricity flows through it, it makes sound — like a tiny speaker!
Real Example: A Simple LED Circuit 🔦
Let’s read a real schematic together:
  ┌───[ R ]───(>|)──┐
  │                  │
 ─┤├─              ──⏚
  │                  │
  └──────────────────┘
Reading it step by step:
- Battery (─┤├─) pushes electrons out
- Electrons flow through the wire ───
- Through the resistor [ R ] — which slows them down
- Through the LED (>|) — which lights up! 💡
- Back to the ground ⏚ — completing the circuit
See? Once you know the symbols, you can trace the path with your finger! 👆
Tips for Reading Schematics 📝
- Follow the lines — lines are wires, and they show where current flows
- Look for the battery first — that’s where the journey begins
- Trace the path — follow from + (positive) all the way around back to −
- Don’t worry about angles — wires can go any direction, it doesn’t matter
- Junctions matter — a dot (●) where lines cross means they’re connected. No dot = they just cross over without touching!
Practice Makes Perfect! 🎯
The more schematics you read, the easier it gets. Start with simple ones like this LED circuit, then try bigger ones. Soon you’ll be reading them like a pro!
Try building a real circuit and drawing your own schematic — it’s like learning a new language! 🗣️
What’s Next? 🚀
Now that I can read circuit symbols, I want to understand the first component on every schematic — the battery! Where does it get its power? How does it push electrons through the wire?
🤔 What’s actually INSIDE a battery? That’s what I’ll explore next time!
If you’re learning electronics with me, join the adventure on Nitvi Talks — 👍 Like, 💬 Comment, 🔔 Subscribe!
See you next time! ⚡